Microsoft Word has a dazzling range of formatting options, many of which you may never need. However, one thing you should definitely learn is how to add page numbers to a document.
You can also adjust the formatting of page numbers to suit your requirements. But how do you do any of this? It’s simple when you know how…
Adding Page Numbers: The Basics
The basics of adding page numbers to a document are reassuringly straightforward. All you have to do is:
- Go to the ‘Insert’ tab in Microsoft Word
- Select ‘Page Number’ from the ‘Header & Footer’ box
- In the dropdown menu, click on the positioning required

The default settings allow you to place them in various places (including footers, headers and margins) and gives you control over alignment (left, centre or right of the page). Clicking any of these will make page numbers appear in the location chosen.
Formatting Page Numbers
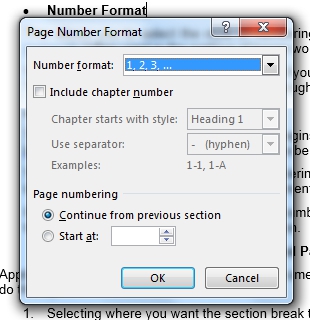
If you followed the instructions above, you might have noticed the ‘Format Page Numbers…’ option in the dropdown menu. Clicking on this opens a new window and provides more options for how page numbers appear in your document.
- Number Format
This allows you to select the style of numbering used. The two most common are roman numerals (often used in the preface of longer works) and Arabic numerals.
You can also click ‘Include Chapter Number’ if you want to add this to your numbering system. This requires use of the ‘Heading’ options though, so make sure to apply these first.
Find this useful?
Subscribe to our newsletter and get writing tips from our editors straight to your inbox.
- Page Numbering
This controls where your page numbering begins. To use this option, add a section break to the appropriate part of your document (see below).
You might, for instance, want the page numbering to begin only after the cover page, or use different styles for different parts of the document.
If this is the case, selecting ‘Start at:’ and a number will allow you to set the page numbering to whatever you require for a particular section.
Section Breaks and Page Numbers
Applying different styles in different parts of a document involves adding a section break. You can do this by:
- Selecting where you want the section break to appear
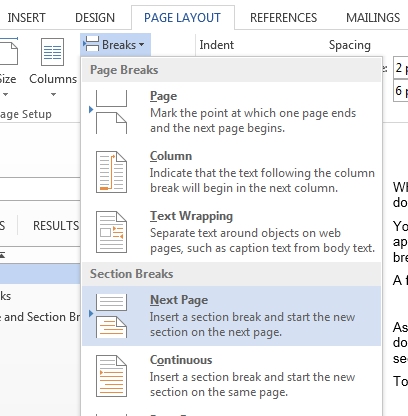
- Going to the ‘Page Layout’ tab and clicking on ‘Breaks’
- Selecting ‘Next Page’ under ‘Section Breaks’ in the dropdown menu

You can now apply different page number styles before and after the break. To do this:
- Go to the ‘Header & Footer’ box on the ‘Insert’ tab
- Select ‘Edit’ under either ‘Header’ or ‘Footer’ to open the header/footer in your document
- Click on the header/footer to which you want to apply a particular number style
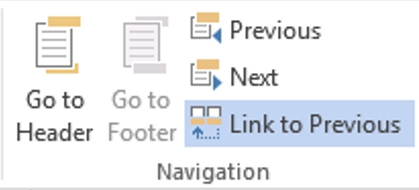
- In the ‘Design’ tab, deselect ‘Link to Previous’

Now, if you change the formatting of page numbers in one section of your document, the page numbers in the preceding section should remain the same.


