Adding a table of contents to your work allows your reader to quickly find specific sections. In a longer document, such as a dissertation or PhD thesis, this is practically essential!
You could create a contents page manually, of course. But if you’re using Microsoft Word, it’s more efficient to add a table of contents using the formatting options available.
MS Word’s dynamic table functionality also makes it possible to update your contents page at the click of a button, saving time and effort later on. In this post, we explain how (instructions apply for MS Word 2007 and later).
Using and Modifying Styles
Before you can create a table of contents, you need to learn how to use the Styles in MS Word. These allow you to apply headings and subheadings consistently throughout your document.
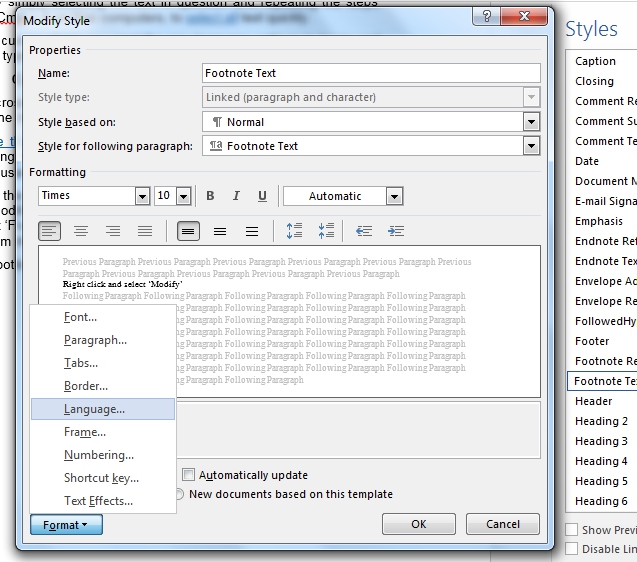
To modify your Styles, first of all, in the Home tab, go to the Styles section and find the style you want to change. Right click on this and select Modify to make a box appear.

From here you can choose a font style and size. If you select the paragraph option from the formatting menu in the bottom left corner, you can also alter the line spacing, indentation and alignment of the selected Style.

For a table of contents, the most important Styles are the Headings (e.g. ‘Heading 1’). Simply select and modify as many of these as you need, using Heading 1 for the main headings and further Heading styles to differentiate your subheadings. You can differentiate between headings in a number of ways (font size, italics, underlining, numbering, etc.).
Once you’ve modified your Styles, apply them accordingly by selecting the text of your headings and subheadings then clicking on the appropriate style.
Find this useful?
Subscribe to our newsletter and get writing tips from our editors straight to your inbox.
Creating a Table of Contents
Now that you’ve formatted your headings, you can create a dynamic table of contents. If you’re using a PC, position the cursor where you want the table to appear and navigate to References > Table of Contents > Automatic Table 1. Clicking this will make your table of contents appear.
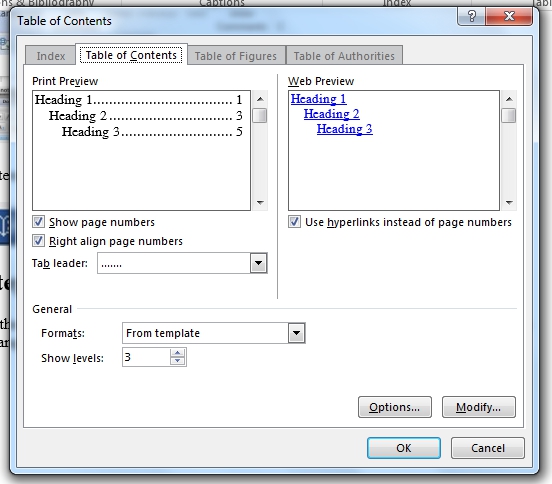
You can also create a custom table of contents in this menu by clicking the relevant option to open a new window. This gives you more control over what to include on the contents page.

If you are using a Mac, the process is equally straightforward: simply navigate to Document Elements > Table of Contents > Formal Table and a table of contents will appear where you positioned the cursor.
Remember to check that all required headings are present in the table, as it’s easy to overlook a subheading or two when applying Styles.
Modifying a Dynamic Table of Contents
Once you have your table of contents, you need to know how to update it when you add, modify or remove a section from your essay or if the pagination has changed.
Luckily, this is a simple process: just select the table and click the Update Table option on the References toolbar (or right click on your table and click the update option there). This will give you the option of updating either just the page numbers or the entire table.
There you go. We told you it was simple. Even simpler, of course, is getting someone else to do it for you, so if you want to see what Proofed’s expert proofreaders can do send in a 500-word free sample today!


