-
3-minute read
-
6th July 2017
Microsoft Word Tips: Page Layout and Margins
When writing an essay, you may need to format the document to fit the rules set out in your university’s style guide. Luckily, Microsoft Word makes this easy, so today we’re looking at how to set the page layout and margins in a document.
Setting the Margins
We’ll start with setting the page margins. To do this, go to the ‘Page Setup’ section of the ‘Layout’ tab on the main ribbon. Under ‘Margins’, you’ll find a list of pre-set options.
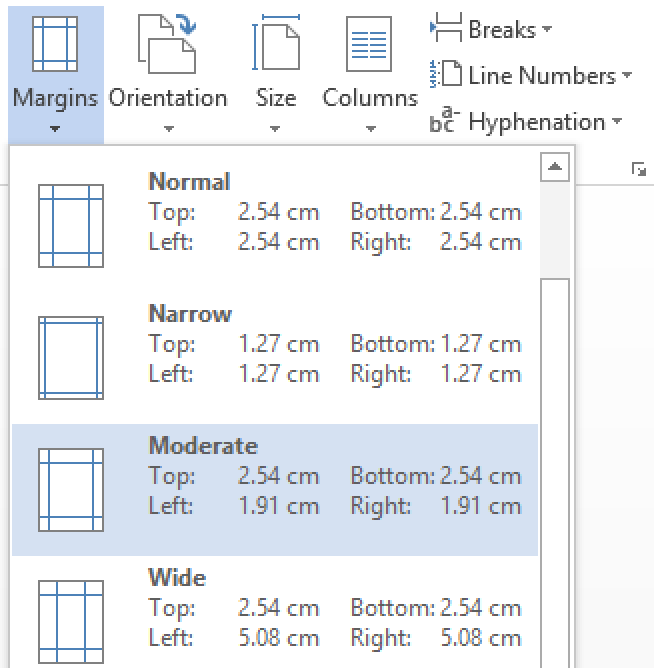
If one of these is suitable, simply click to use it. If not, you can set custom margins:
- Go to Layout > Page Setup > Margins
- In the menu, select ‘Custom Margins…’ from the bottom
- Set the top, bottom, left and right margins as required in the new window
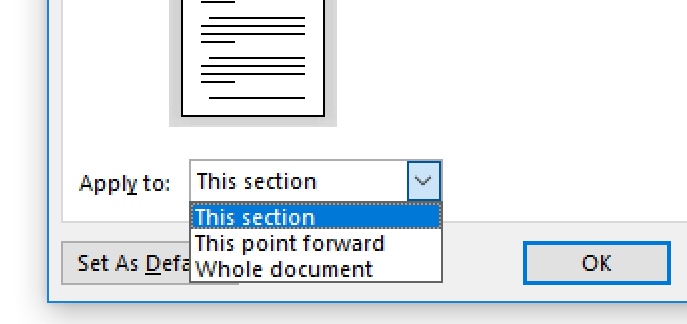
By adding section breaks to your document, you can also apply different margin sizes to different parts of an essay. To do this, simply select the relevant option (‘Whole document’, ‘This section’ or ‘This point forward’) from the ‘Apply to’ menu.
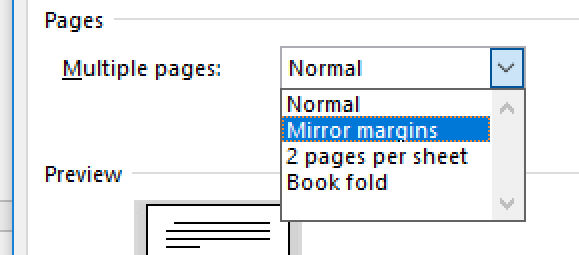
Another option is to use ‘mirror margins’, which makes the inner margins on odd and even pages equal. This is useful if you need to print on both sides of the paper (i.e. in a style suitable for binding as a book). To do this:
Find this useful?
Subscribe to our newsletter and get writing tips from our editors straight to your inbox.
Subscribe to Beyond the Margins and get your monthly fix of editorial strategy, workflow tips, and real-world examples from content leaders.
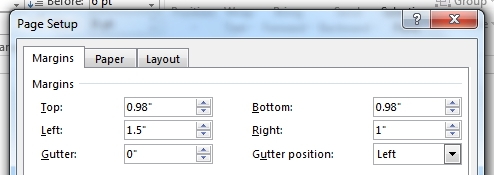
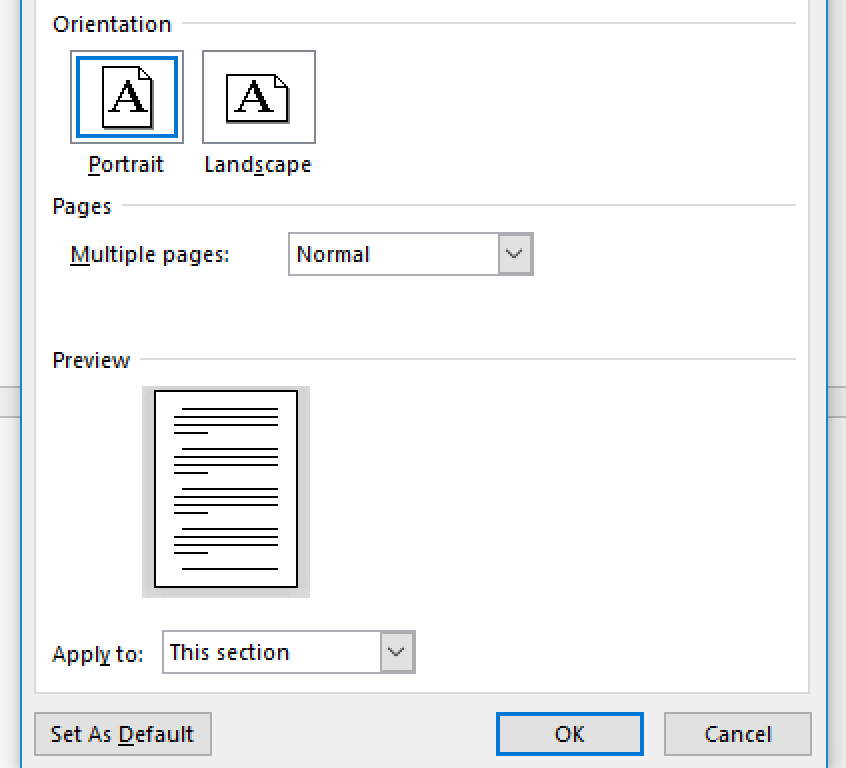
- Click ‘Custom Margins…’ to open the ‘Page Setup’ options
- Choose ‘Mirror margins’ in the ‘Multiple pages’ menu
- Set the ‘Inside’ and ‘Outside’ margin sizes as required
Page Orientation
The other major aspect of page layout is orientation, which controls whether the page is displayed portrait or landscape. To set this in a document:
- Go to Layout > Page Setup > Orientation
- Select ‘Portrait’ or ‘Landscape’ from the dropdown menu as required

This can be useful if you need to add a chart or illustration to a document, but it won’t fit on a portrait page. To insert a landscape page:
- Add section breaks before and after the page you want to set to landscape
- Place the cursor on the page you want to format
- Click on the arrow in the bottom right of the ‘Page Setup’ section to open the menu
- Select ‘Landscape’ under ‘Orientation’
- Select ‘This section’ from the ‘Apply to’ menu
Once this is done, you’ll have a separate landscape section in your document where you can add any images, charts or illustrations as required.