-
3-minute read
-
8th November 2016
Microsoft Word Tips: Changing Text Direction
Most of the time, text direction won’t be an issue when using Microsoft Word to write in English or another script that reads from left-to-right, since this is the default for most versions of Word.
However, if your copy of Word comes from a region where right-to-left scripts are common, or if you’re editing/proofreading a document that was originally written on a version of Word in which right-to-left scripts are the default, you could have a problem.
Thankfully, there is a formatting option in Word to change the direction of text (unless you’re a Mac user, but we’ll get to that later). All you need to do is follow these instructions.
Word for Windows
In Word 2010 or later, if you have both left-to-right and right-to-left language and keyboard settings installed on your copy of Word, ‘LTR’ and ‘RTL’ buttons should be accessible via the ‘Paragraph’ section of the ‘Home’ tab. This makes changing text direction much easier.
If you don’t have the correct language options installed, though, you can still use these buttons by adding them to your Quick Access Toolbar.

To add these commands, simply:
- Click the little arrow on the right hand side of your toolbar
- Select ‘More Commands’ from the dropdown menu
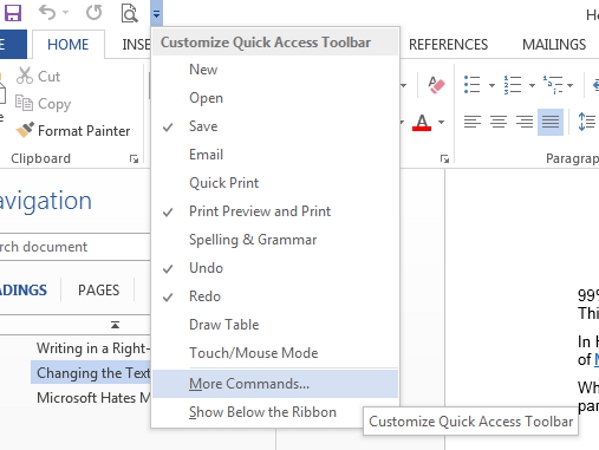
‘More Commands…’ - In the window that opens, set the ‘Choose Commands From’ menu to ‘All Commands’
- Next, find ‘Right-to-Left Text Direction’ and/or ‘Left-to-Right Text Direction’ in the list
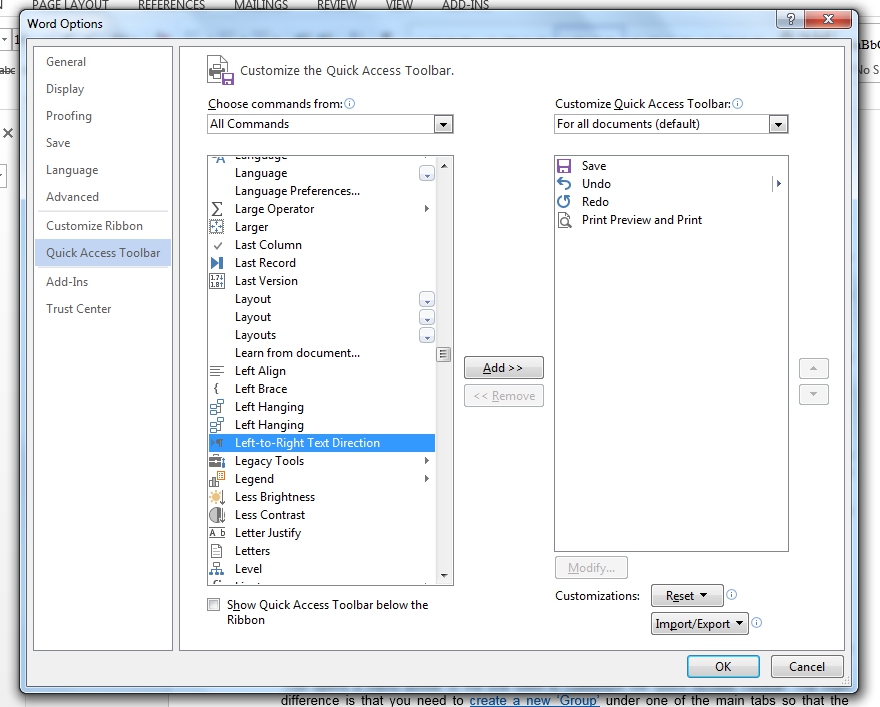
Scroll down to find the right commands. - Select the command(s) you need and click ‘Add’ to add them to your toolbar
You can then use these to change the text direction in your document (or just part of a document, if you select the relevant passage first).
Find this useful?
Subscribe to our newsletter and get writing tips from our editors straight to your inbox.
Subscribe to Beyond the Margins and get your monthly fix of editorial strategy, workflow tips, and real-world examples from content leaders.
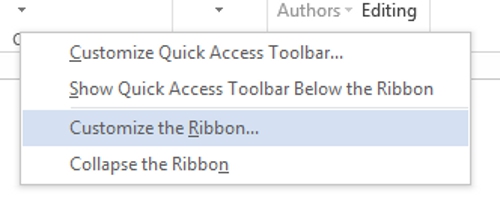
A similar process can be used to add buttons to your main ribbon using the ‘Customize the Ribbon’ option and adding a new ‘Group’ for the commands.
It’s worth remembering that Microsoft Word treats comments, headers and footers as distinct from the main document when it comes to language options. As such, you may have to change the text direction in these sections separately if required.
Word for Macs
If your version of Microsoft Word for Mac is earlier than the 2016 version, you might find that it doesn’t provide the same level of customisation as described above. We assume this is part of Bill Gates’ plan for world domination, but we’re not entirely sure how or why.

(Image: WEF/Sebastian Derungs)
Anyway, if you are a Mac owner, you’ll be happy to know there’s a workaround for the lack of options in your copy of Word if you need to set a script so that it reads left-to-right. Simply:
- Copy and paste your text into Pages so that it defaults to a left-to-right format
- Copy and paste this reformatted text back into Word
With any luck, you’ll now find that it reads in the direction you wanted. You can then get back to working on your document without worrying about everything seeming backwards!