-
3-minute read
-
13th April 2017
Bullet Points and Numbered Lists in Microsoft Word
For those who struggle for brevity in writing, using bullet points and numbered lists can help ensure clarity. And they are particularly good when giving examples or outlining a process.
Thankfully, Microsoft Word makes it easy to add these to your work.
Using Bullet Points
Bullet points are generally used when listing things non-sequentially (i.e. when the order doesn’t matter). As a general rule, though, bullet points aren’t used for lists of less than four items, since these lists can be included in the main text of your document.
To insert a bullet pointed list when using Microsoft Word 2010 or later:
- Place the cursor where you want to add the list.
- In the ‘Home’ tab, find the bullet point button under ‘Paragraph’.
- If you’re happy with the default bullet point type, click the icon.
- If you want a specific style of bullet, click the arrow and select one from the menu.
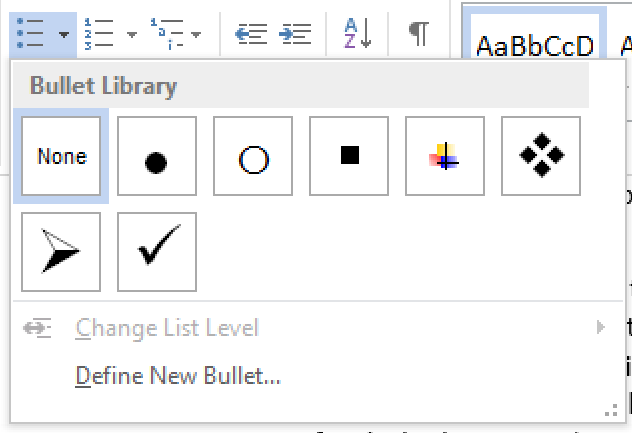
Selecting a bullet point style. - Write the first item in your list, then press ‘Enter’ to add a new bullet.
- To finish your list, press ‘Enter’ twice after the final item.
If you really want to mix things up, you can even use custom images as bullet points!

Using Numbered Lists
Numbered lists are used when you want to list items sequentially or in order of importance. The way to do this is very similar to inserting bullet points:
Find this useful?
Subscribe to our newsletter and get writing tips from our editors straight to your inbox.
Subscribe to Beyond the Margins and get your monthly fix of editorial strategy, workflow tips, and real-world examples from content leaders.
- Place the cursor where you want to start the list.
- Under the ‘Home’ tab, find the ‘Numbering’ button.
- To use the default number type, simply click the icon.
- To select a custom numbering system, click the arrow for more choices.
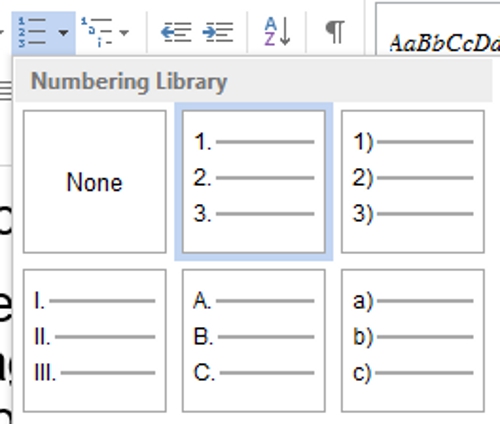
Numbering/lettering options. - Write the first item in your list, then press ‘Enter’ to move to the next one.
- To finish the list, press ‘Enter’ twice after writing the final item.
For more customisation, you can also play with the ‘Define New Number Format’ options.
Using Multilevel Lists
If you’re feeling extra adventurous, you can even use a ‘multilevel’ list. This is especially useful if you want to include sub-lists within your main list.

To create a multilevel list:
- Place the cursor where you want to start the list.
- In the ‘Home’ tab, click the ‘Multilevel list’ icon or select a list style from the menu.
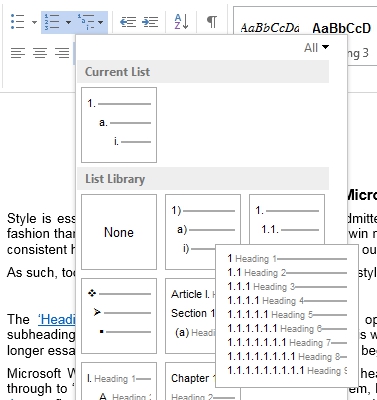
The multilevel list menu. - Write your list as normal until you want to include a sub-list.
- Add a new point in your list. At this point you have two options:
- Press ‘Tab’ button on the next line. The line will indent itself and use the next list level in the style you have selected each time you press tab.
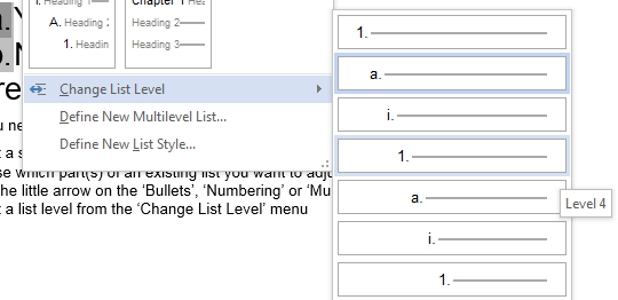
- In the bullet point, numbered list or multilevel list menus, select the level you want to use with the ‘Change list level’ option.
And for more control, click ‘Define New Multilevel List’ in the ‘Multilevel list’ menu. Here, you can change the settings for the different levels of a multilevel list.