-
3-minute read
-
11th September 2017
Microsoft Word Tips: How to Add Chapter Headers
Writing a longer essay or dissertation that is broken up into several sections? In that case, you might want to add chapter headers to help your reader navigate the document.
Luckily, this is easy to do in Microsoft Word, as we will now explain.
Applying Styles
Microsoft Word uses the ‘Heading’ styles to generate chapter headers. As such, the first step in adding chapter headers to your document is formatting your headings. To do this:
- Find ‘Heading 1’ in the ‘Styles’ gallery (you may need to edit the style first)

The ‘Styles’ gallery. - Go through your document, applying ‘Heading 1’ to all chapter headings
You don’t have to use ‘Heading 1’ for this (any ‘Heading’ style will do). But usually you would use ‘Heading 1’ for the main headings in your document, which are the ones you’ll use in headers.
Adding Section Breaks
The next step is to add section breaks between chapters. This involves:
Find this useful?
Subscribe to our newsletter and get writing tips from our editors straight to your inbox.
Subscribe to Beyond the Margins and get your monthly fix of editorial strategy, workflow tips, and real-world examples from content leaders.
- Finding the first chapter heading in your document
- Placing the cursor before the heading
- Going to ‘Layout’ on the main ribbon
- Clicking ‘Breaks’ in the ‘Page Layout’ section and selecting ‘Next Page’ from the menu
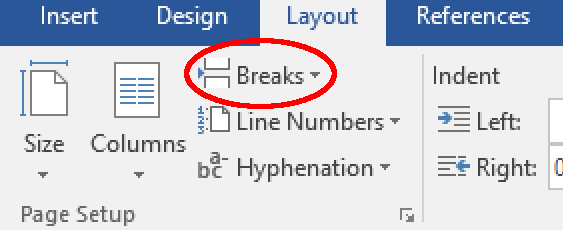
The ‘Breaks’ menu. - Repeating this for each chapter heading in your document
Once you have done this, each chapter in your document should start on a new page.
Adding the Headers!
You are now ready to add headers to your document! Hooray! Before we get carried away, though, you need to make sure each section in the document is separate. To do this:
- Find the first chapter heading in your work
- Open the header by going to Insert > Header & Footer > Header > Edit Header
- Go to Design > Navigation and deselect ‘Link to Previous’
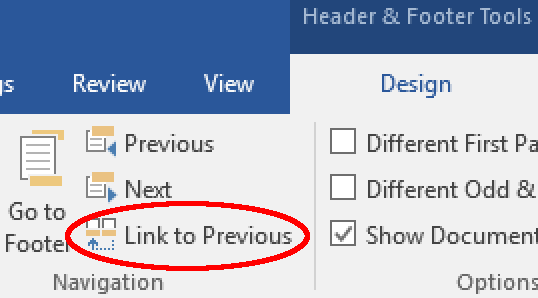
Navigation options. - Repeat for each chapter or section in the document
Now, Microsoft Word will know where each chapter starts and ends. As such, you can apply distinct chapter headers to each section. All you need to do is:
- Open the header anywhere in the first chapter (as above)
- Go to References > Captions > Cross-reference
- Select ‘Heading’ under ‘Reference type’ in the new window
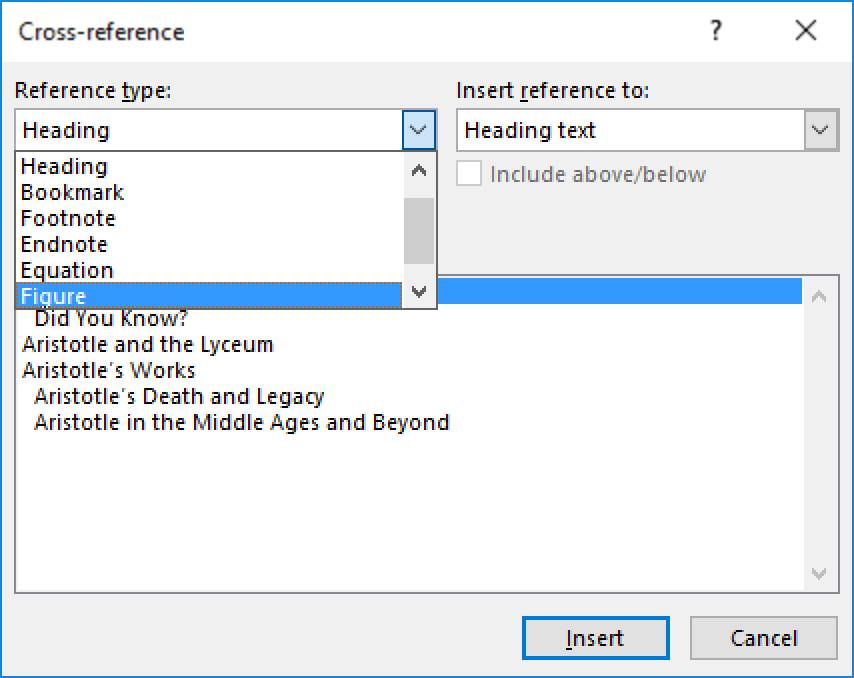
Adding headers. - Pick the required heading from the list and click ‘Insert’
This will add a header throughout the section selected. If you repeat this for each chapter, you’ll have a nicely formatted document at the end of it. Just remember that these headers don’t update automatically. As such, if you change a heading, you’ll need to update the header, too.