-
3-minute read
-
8th January 2018
Microsoft Word Tips: In Depth on Indentation
Many people use ‘Tab’ to indent something in Microsoft Word, but this can cause issues during editing (e.g. having to delete gaps when combining paragraphs in an essay). As such, the alternative indentation options in Word are a better choice in most cases.
Basic Indentation
The indentation options control how far text is from the margins. To increase or reduce the indentation from the left margin, all you need to do is click the relevant buttons in the ‘Paragraph’ section of the ‘Home’ tab on the main ribbon.

However, for more control over indentation, you need to click the little arrow in the bottom right of the ‘Paragraph’ section to open the main menu (Format > Paragraph in Word for Mac).
One you’ve accessed the main menu, you’ll see a section called ‘Indentation’. The ‘Left’ and ‘Right’ boxes here allow you to set a custom indentation value for selected text.
Most of the time, you’ll be indenting something from the left margin. However, if you set the ‘Left’ and ‘Right’ indentations to the same value, you can position text in the centre of the page without having to change the text alignment.
Special Indentations
The ‘Indentation’ section of the paragraph menu also includes a ‘Special’ section. This offers two different types of indentation that you might need to use:
Find this useful?
Subscribe to our newsletter and get writing tips from our editors straight to your inbox.
Subscribe to Beyond the Margins and get your monthly fix of editorial strategy, workflow tips, and real-world examples from content leaders.
- First line – This option lets you indent only the first line in a paragraph. This is roughly equivalent to hitting tab at the start of a paragraph, but you can also select a custom value. Some style guides recommend using this instead of paragraph spacing to show where paragraphs begin and end. However, this is quite rare in modern academic writing.

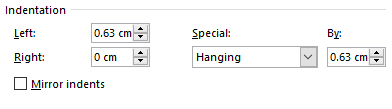
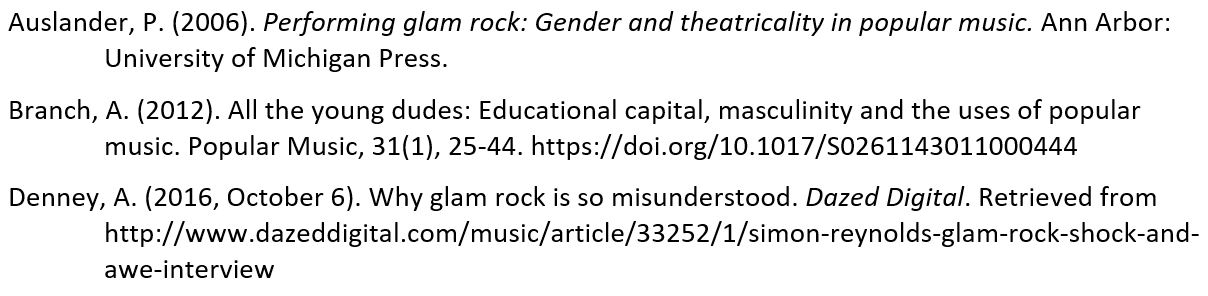
- Hanging – A ‘hanging’ indent is applied to lines after the first one in a paragraph. This is common in reference lists, with some systems (e.g. APA) requiring use of a hanging indent for references. Make sure to check your style guide if you’re not sure whether to use hanging indents in your work.
With both of these ‘special’ indentations, all you need to do is select the required option and set the value accordingly (e.g. a hanging indent in a reference list is usually about 1.27cm).
Mirror Indents
There is also a ‘Mirror indents’ option in the paragraph menu. If you click this, the indentation options change from ‘Left’ and ‘Right’ to ‘Inside’ and ‘Outside’. This can be useful if you are printing on both sides of the paper.
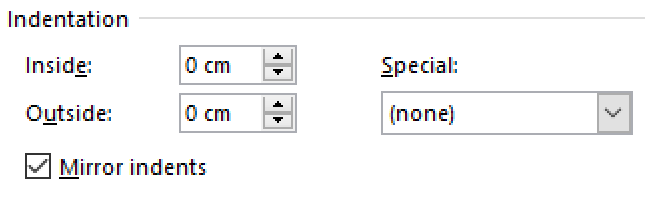
Essentially, ‘mirroring’ means that odd and even pages are ‘mirrored’ so that indentations are applied in relation to the place where pages meet. This ensures that indentations are consistent throughout the document.
The idea here is the same as with ‘Mirror Margins’. As such, you may want to use mirror indents if you are also using mirrored margins.